
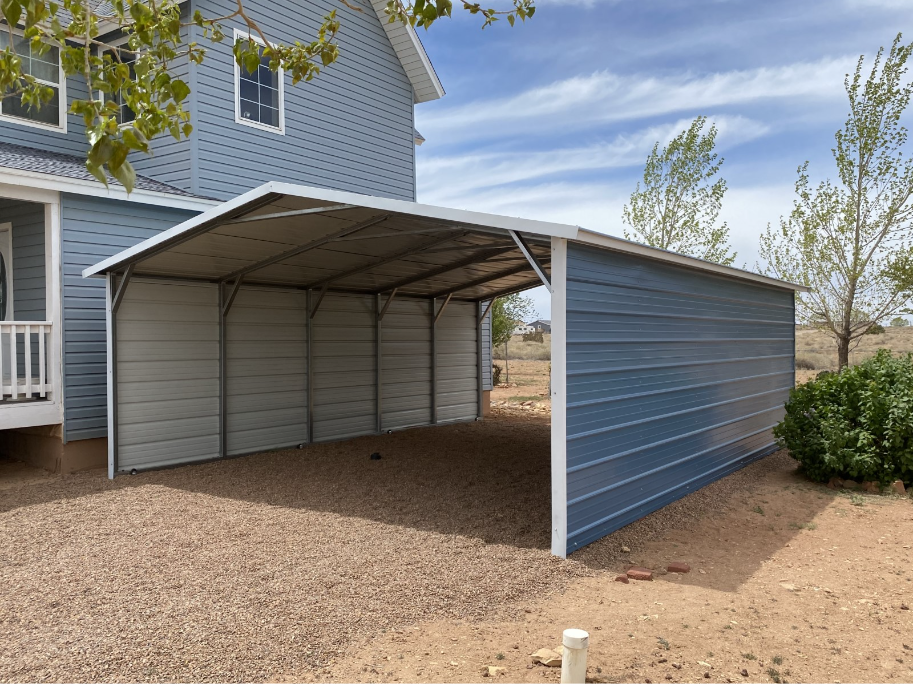
Different Ways to Maintain Steel Carports
Steel carports, with their durability and resilience, have gained popularity as efficient shelter solutions for cars, RVs, and even outdoor social spaces. However, like any other structure, they require routine maintenance to extend their lifespan and keep them looking good.
Different Ways to Maintain Steel Carports
Here are different ways to maintain your Show Low, AZ steel carports.
1. Regular Cleaning
The simplest, yet most effective way to maintain a steel carport is by cleaning it regularly. Remove debris such as leaves, branches, or snow that might accumulate on the roof. Use a broom or blower for this purpose, ensuring the weight does not cause damage or encourage rust formation. For the walls, use a mild detergent mixed with water and a soft brush to scrub away dirt and grime. Rinse with clean water and allow it to dry thoroughly.
2. Rust Prevention and Treatment
While steel carports are often made of galvanized steel, rust can still become an issue in certain conditions. Regularly inspect your carport for any signs of rust, paying special attention to areas where water tends to pool. If you spot rust, use a wire brush to scrub it off, then apply a rust converter followed by a rust-resistant paint. Consider applying a rust-proof coating on your carport every few years for added protection.
3. Check for Damage
Regularly inspect your steel carport for any signs of damage, such as dents, scratches, or bent components, especially after severe weather. Small issues can quickly become big problems if left unaddressed. Replace damaged parts promptly and consider having a professional assess the structure if you spot any major damage.
4. Tighten Loose Bolts
Over time, bolts and screws on your steel carport can loosen due to wind and regular use. Regularly check all fasteners and tighten any that are loose. This not only helps maintain the stability of the structure but also prevents any possible damage that might occur due to parts shaking or moving.
5. Repaint When Necessary
While steel carports come with a baked-on enamel paint that lasts a long time, you might need to repaint it eventually. This could be due to scratches that expose the steel, or simply because the color has faded over time. Use paint that’s designed for outdoor use on metal and can withstand various weather conditions.
6. Check for Leaks
After heavy rain or snow, check your carport for any leaks. If you find a leak, it’s important to address it immediately to prevent any further damage. This might involve resealing joints or replacing certain sections of the carport.
7. Anchor Inspection
Anchors secure the carport to the ground and are crucial for its stability, especially in high winds. Inspect your carport’s anchors regularly to ensure they remain in good condition and are secure. If you notice any problems, it’s advisable to get a professional to check them.
8. Professional Inspections
While routine maintenance can be done yourself, consider having a professional inspection every few years. They can spot potential issues that you might miss and provide expert advice on maintenance and repairs.
Conclusion: Different Ways to Maintain Steel Carports
With regular care and attention, your steel carport can continue to look great and serve its purpose for many years. Remember, maintenance is always easier and cheaper than repairs, so make it part of your routine to check your carport’s condition and address any issues promptly.
Recent Comments